


Resumo
A hot air brush represents a significant innovation in personal hair care, merging the functionality of a hair dryer with the shaping capabilities of a styling brush. Its primary purpose is to offer an efficient, single-step method for drying, smoothing, and volumizing hair, thereby replicating a professional salon blowout with a single tool. An examination of its operation reveals a mechanism based on heated airflow projected through a bristled barrel, which styles the hair with less direct, intense heat compared to traditional flat irons or curling wands. Proper utilization involves a multi-step process, beginning with hair that is partially air- or towel-dried, followed by systematic sectioning to ensure uniform styling. The selection of appropriate heat settings plus attachments is paramount, tailored to the user’s specific hair type and desired outcome. Mastering the technique allows for the creation of volume at the roots, sleekness through the lengths, plus polished ends, all while potentially mitigating heat damage through controlled temperature and reduced styling time.
Principais conclusões
- Begin styling when your hair is approximately 80% dry for optimal results.
- Divide your hair into manageable sections to ensure even drying plus styling.
- Always apply a quality heat protectant spray to minimize potential damage.
- Focus the brush at the roots first to build foundational, lasting volume.
- Select the correct attachment for your specific styling goal, like smoothing or curling.
- Use the cool shot button on each section to set your style for all-day hold.
- A clear understanding of how to use a hot air brush elevates your styling routine.
Índice
- Understanding the Hot Air Brush: A Fusion of Drying and Styling
- Step 1: Preparing Your Canvas – The Foundation of a Flawless Blowout
- Step 2: The Art of Sectioning – Divide and Conquer for Consistent Results
- Step 3: Selecting Your Tools and Settings – Customizing for Your Hair Type
- Step 4: Mastering the Root Lift – The Secret to Lasting Volume
- Step 5: The Styling Pass – Shaping the Mids and Ends
- Step 6: The Cool Shot – Locking in Your Look for Longevity
- Step 7: Finishing Touches and Maintenance – Preserving Your Style
- Perguntas frequentes (FAQ)
- Conclusão
- Referências
Understanding the Hot Air Brush: A Fusion of Drying and Styling
The emergence of the hot air brush into the landscape of personal grooming tools marks a pivotal moment in the democratization of professional hairstyling techniques. It is not merely another gadget; it represents a conceptual shift in how we approach the daily ritual of preparing our hair. To truly appreciate its utility, one must first grasp its fundamental nature, which is a synthesis of two distinct functions: the convective heat of a blow dryer with the mechanical shaping of a styling brush. Let us explore the origins, mechanics, science, plus variety of these transformative devices.
The Evolution from Hair Dryer to All-in-One Styler
The journey toward the modern hot air brush began with its separate predecessors. For decades, achieving a voluminous, smooth blowout required a level of ambidextrous skill few possessed outside a salon environment. It demanded holding a heavy blow dryer in one hand while maneuvering a round brush with the other, a coordinated effort that often resulted in tired arms, tangled hair, plus inconsistent results. The problem was one of ergonomics plus efficiency. Hair tool innovators, likely observing these struggles, sought a more integrated solution (Maxius Beauty, 2025). The conceptual leap was to combine the heat source directly into the styling barrel. Early iterations were often clunky, offering limited heat control or weak airflow. However, as technology advanced, so did the sophistication of these tools. Motors became lighter yet more powerful, materials science introduced ceramic plus tourmaline coatings for better heat distribution, plus ergonomic design made them more comfortable to wield. The contemporary hot air brush is a testament to user-centered design, transforming a two-handed, complex task into a streamlined, one-handed operation.
Deconstructing the Tool: Barrels, Bristles, and Attachments
At its core, a hot air brush consists of a handle containing a motor plus a heating element, which leads to a vented barrel. The design of each component is deliberate.
The barrel is the heart of the styling action. Its diameter dictates the type of curl or bend you can achieve; larger barrels create gentle waves plus volume, while smaller barrels produce tighter curls. The material is also significant. Ceramic barrels are prized for their ability to heat up evenly, reducing the risk of damaging hot spots. Tourmaline-coated barrels go a step further by emitting negative ions when heated. These ions interact with the positive ions in wet hair, helping to break up water molecules more quickly, which reduces drying time. A quality escova de ar quente often incorporates such advanced materials.
The bristles play a crucial role in gripping the hair to create tension. Without adequate tension, the hair cannot be effectively smoothed or shaped. Bristles come in several forms. Nylon pin bristles are excellent for detangling plus providing a firm grip, often tipped with ball-points for scalp comfort. Tufted bristles, which are shorter plus denser, help smooth the hair plus enhance shine. Many modern brushes use a combination of both types to detangle, grip, smooth, plus add shine simultaneously.
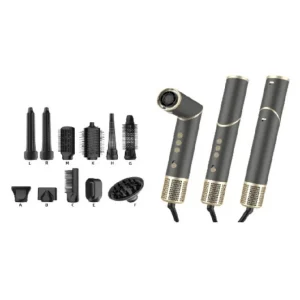
Finally, many advanced models, like multi-styler kits, come with a suite of interchangeable attachments [Amazon.com](). These may include a pre-styling dryer to remove excess moisture, different-sized barrels for various curl patterns, a paddle brush attachment for sleek straightening, plus a volumizing brush attachment Mashable.com. A versatile 11-in-1 hot air styler brush exemplifies a tool designed for complete hair styling versatility.
The Science of Airflow and Heat: How It Styles Without Extreme Damage
The styling process hinges on a delicate interplay between heat, water, plus the structural proteins in your hair. Each hair strand is primarily composed of a protein called keratin, held together by chemical bonds. The strongest of these are disulfide bonds, which are permanent plus give hair its natural shape. Weaker, more numerous hydrogen bonds are also present. These hydrogen bonds are easily broken by the application of water plus reformed into a new shape as the hair dries (Robbins, 2012).
A hot air brush leverages phenomenon. Unlike a flat iron, which uses direct, conductive heat to clamp down on hair plus force it into shape, a hot air brush uses convective heat. Hot air flows from the barrel, surrounding the hair section. The heat works with the water present in damp hair to break the temporary hydrogen bonds. Simultaneously, the mechanical action of the brush, guided by your hand, pulls the hair into a new configuration—straight, curled, or volumized. As the hot air continues to flow, it evaporates the water, allowing the hydrogen bonds to reform in their new position. The style is then set. Because the heat is less direct plus often at a lower temperature than a traditional iron, the risk of causing irreversible damage to the keratin protein structure is reduced, provided the tool is used correctly.
Choosing Your Instrument: A Comparison of Hot Air Brush Types
The market offers a variety of hot air brushes, each suited to different needs. Understanding the primary categories can help you make an informed choice.
| Brush Type | Primary Function | Best For Hair Type | Caraterísticas principais |
|---|---|---|---|
| Static Oval Brush | Volume, smoothing, soft waves | Fine to medium, all lengths | Large oval shape lifts roots easily plus smooths large sections. |
| Rotating Brush | Polished curls, automated styling | Medium to thick, shoulder-length or longer | Barrel rotates automatically, wrapping hair for a consistent curl. |
| Paddle Brush Styler | Sleek straightening, detangling | All types, especially thick or curly | Flat, wide surface smooths hair quickly, mimicking a flat iron. |
| Multi-Styler System | Versatility (curling, straightening, volumizing) | All types, for users wanting multiple styles | Interchangeable heads for different functions. |
A static oval brush is perhaps the most popular type, celebrated for its ability to create immense volume plus a classic blowout look. A rotating brush offers a higher degree of automation, which can be helpful for creating uniform curls but may have a slight learning curve. A paddle brush attachment is an excellent choice for those who primarily seek a straight, sleek finish with minimal effort. A multi-styler system provides the ultimate flexibility, though it often comes at a higher price point. Your choice depends on your primary styling goals, your hair type, plus your budget.
Step 1: Preparing Your Canvas – The Foundation of a Flawless Blowout
The final quality of any artistic endeavor is deeply contingent upon the preparation of the surface. A painter would not apply oils to a dusty or unstable canvas; similarly, a hairstylist cannot achieve a masterful result on improperly prepared hair. Before you even plug in your hot air brush, a series of preparatory steps must be thoughtfully executed. These actions are not mere preliminaries; they are foundational to the entire process, ensuring the hair is receptive to styling, protected from thermal stress, plus primed for a smooth, lasting finish.
The Optimal Dampness Level: Why Starting with Soaking Wet Hair is a Mistake
A common point of confusion for new users of a hot air brush revolves around the ideal moisture level of the hair before styling. Should one begin with hair straight from the shower, dripping wet? The answer is a definitive no. Attempting to style soaking wet hair is inefficient plus potentially damaging.
Consider the physics involved. The primary goal of the tool is to use heat to evaporate water, allowing hydrogen bonds to reform. When hair is saturated, the sheer volume of water requires a prolonged application of heat to each section. Exposing the hair to heat for such an extended period increases the risk of thermal damage, wherein the internal moisture of the hair shaft itself can boil, creating steam-filled bubbles that permanently damage the cuticle (Lee et al., 2011). You are not just drying the surface; you risk cooking the hair from within.
The ideal state for hair before styling with a hot air brush is about 80% dry. At this stage, the hair is no longer dripping but feels damp to the touch. It has enough moisture for the hydrogen bonds to be malleable, yet not so much that it requires excessive drying time. You can achieve level of dampness by gently towel-drying your hair with a microfiber towel to reduce friction plus frizz, then allowing it to air-dry for a period. Alternatively, many multi-styler kits come with a rough-dryer attachment specifically for quickly bringing your hair to the perfect pre-styling state of dampness.
The Protective Barrier: Selecting and Applying Heat Protectant
Exposing hair to elevated temperatures without a protective buffer is akin to handling a hot pan without an oven mitt; a burn is almost inevitable. Heat protectants are non-negotiable products in the arsenal of anyone who uses thermal styling tools. Their function is to create a shield between the hair fiber plus the heat source.
Most heat protectants work through a combination of ingredients. Silicones like dimethicone or cyclomethicone are common, as they form a thin, protective film over the hair shaft. film serves two purposes: it slows down heat conduction, distributing the heat more evenly, plus it seals the cuticle to reduce moisture loss from within the cortex (Gavazzoni Dias, 2015). Other ingredients, such as hydrolyzed proteins (like keratin or silk), can fill in gaps in the cuticle, strengthening the hair, while certain polymers can absorb heat.
When selecting a protectant, consider your hair type. Fine hair benefits from lightweight sprays that will not weigh it down. Coarse or thick hair might respond better to cream-based or oil-based protectants that offer more conditioning. Application is just as vital as selection. The product must be distributed evenly. After towel-drying, mist or work the product through your hair, from roots to ends. Use a wide-tooth comb to ensure every strand is coated. Do not oversaturate the hair; a light, even coating is sufficient. Think of it as applying a primer before paint—it creates a uniform, protected surface ready for the main event.
To Detangle or Not to Detangle: A Pre-Styling Necessity
Imagine trying to glide a brush through a knotted rope; the resistance would be immense, plus the fibers of the rope would fray. The same principle applies to your hair. Attempting to pull a hot air brush through tangled hair is a recipe for frustration, breakage, plus a patchy, uneven style.
Detangling is an absolute necessity. Hair is most fragile when wet, so gentle handling is paramount. The best tool for purpose is a wide-tooth comb or a brush specifically designed for wet hair. Start at the ends of your hair, not the roots. Gently work through the tangles at the bottom, gradually moving your way up the hair shaft toward the scalp. a method prevents you from pulling a small knot down the entire length of the hair, which can tighten it plus cause the strand to snap. By starting at the bottom, you gently release each tangle individually. Once your hair is completely free of knots, you have created a clear path for the hot air brush to glide through smoothly. action not only prevents breakage but also ensures that the heat plus airflow from the brush can reach every strand evenly, leading to a much more polished final result.
Step 2: The Art of Sectioning – Divide and Conquer for Consistent Results
After preparing the hair, the next phase involves a strategic organization of the canvas itself. One of the most significant distinctions between an amateur attempt at a blowout plus a professional-grade result lies in the simple, yet profound, act of sectioning. To the uninitiated, dividing the hair into smaller bunches might seem like a fussy, time-consuming step. However, its importance cannot be overstated. It is a methodical approach that transforms a potentially chaotic process into a controlled, manageable one, ensuring every strand receives the attention it deserves.
Why Sectioning Matters: Avoiding Tangles and Ensuring Even Heat Distribution
Attempting to style your entire head of hair at once with a hot air brush is an exercise in futility. The outer layers may get styled, while the dense underlayers remain damp plus untouched. The brush will inevitably snag on the large, unwieldy mass of hair, creating tangles plus leading to an uneven, frizzy finish. Sectioning solves these problems through a simple principle: control.
By working with smaller, more manageable sections, you gain complete control over the tool plus the hair. You can ensure that the barrel of the brush makes contact with all the hair within that section, from root to tip. a controlled pass allows for the uniform distribution of heat plus airflow, which is the key to a consistent style. It guarantees that the hair dries evenly, that the smoothing action of the bristles is applied consistently, plus that the volume you create at the root is uniform across the entire head.
Furthermore, sectioning drastically reduces the likelihood of tangles. The brush is only interacting with a small amount of hair at a time, making it easy to keep the strands aligned plus moving in the same direction. It is the difference between trying to comb a whole skein of yarn at once versus combing a few strands at a time. The latter approach is always more effective.
Tools of the Trade: Clips, Combs, and Your Hands
The process of sectioning does not require an elaborate set of tools. A few simple items are all that is needed to bring order to your hair.
The most valuable tool for sectioning is a set of large hair clips. Duckbill clips or alligator clips are ideal, as they can hold a significant amount of hair securely out of the way without leaving creases. You will typically need between four to six clips, depending on the thickness of your hair.
A pintail comb can be useful for creating clean, precise partings, although it is not strictly necessary. The long, thin handle (the “pintail”) is perfect for drawing straight lines through the hair to create your sections. However, for a less formal approach, your fingers can work just as well to separate the hair into general quadrants.
The goal is not to create perfectly geometric sections but to simply isolate the portion of hair you are working on from the rest. The clips are there to maintain that separation, preventing the unstyled hair from falling into plus interfering with the section you are actively styling.
A Practical Method for Sectioning Different Hair Lengths and Textures
While the principle of sectioning is universal, the specific method can be adapted to suit your hair’s unique characteristics.
A standard, effective method begins with parting your hair as you would normally wear it (center, side, etc.). Then, create a horizontal part from ear to ear across the back of your head, effectively dividing your hair into a top half plus a bottom half. Clip the entire top half up securely. Now, the bottom half is your starting area. Depending on the thickness of your hair, you may want to divide bottom half into two smaller sections, one on the left plus one on theright.
You will now work with one of these smaller, more manageable sections from the bottom layer. Once you have completely dried plus styled section, you can unclip a new section from the top half to work on next. A common approach is to release another horizontal layer of hair from the clipped-up portion, about one to two inches wide, plus begin styling that. You continue process, working your way up the head from bottom to top, layer by layer. The very last sections to be styled are typically the front pieces around your face plus the hair at the crown, which are often styled for maximum volume.
For very thick or curly hair, you will need to create more sections. The key is that each section should be no wider than the barrel of your hot air brush. For fine hair, fewer sections will suffice. The principle remains the same: isolate, style, release, repeat. a methodical progression ensures a result that is not only beautiful but also remarkably consistent plus long-lasting.
Step 3: Selecting Your Tools and Settings – Customizing for Your Hair Type
With the hair prepared plus sectioned, the moment arrives to engage with the hot air brush itself. These devices are not one-size-fits-all; they are sophisticated instruments equipped with variable settings plus specialized attachments designed to cater to a wide spectrum of hair types plus styling ambitions. The act of selecting the right attachment plus dialing in the appropriate heat plus speed settings is a critical judgment. It is where you, the stylist, adapt the tool to the unique character of your hair, ensuring an outcome that is not only aesthetically pleasing but also achieved with a deep respect for the hair’s integrity.
Decoding the Attachments: From Volumizing Ovals to Smoothing Paddles
Many modern hot air stylers are not singular tools but modular systems. They come with an array of interchangeable heads, each with a distinct purpose. Understanding the function of each attachment is key to unlocking the full potential of your device.
| Attachment Type | Shape | Primary Styling Goal | How It Works |
|---|---|---|---|
| Oval Barrel | Large, elliptical | All-over volume, smoothness, soft bends | The wide sides smooth hair, while the curved edges create lift at the root plus bend at the ends. |
| Round Brush | Circular (various sizes) | Curls, waves, body, bangs | Wraps hair around the barrel to create a distinct curl or wave pattern. Smaller barrels create tighter curls. |
| Paddle Brush | Flat, rectangular | Sleek straightening, fast drying | Glides down the hair shaft, using tension plus airflow to straighten plus smooth large sections quickly. |
| Pre-Styling Dryer | Concentrator nozzle | Removing excess moisture | Directs airflow to quickly take hair from wet to damp, preparing it for the styling attachments. |
| Flyaway Smoother | Curved or slotted | Taming frizz plus flyaways | Uses airflow to attract plus tuck down shorter, stray hairs for a polished, smooth finish. |
The oval barrel is the workhorse for achieving a classic salon blowout. Its shape is ingeniously designed to perform multiple functions at once. The round brush attachments are for more specific curl creation, allowing for everything from bouncy ringlets to soft, beachy waves. The paddle brush is the express route to a sleek, straight look, particularly effective on naturally wavy or moderately curly hair. The pre-styling dryer is a utility attachment, saving you time by efficiently preparing your hair for the main event. Learning which attachment corresponds to your desired look is the first step in mastering your tool.
Temperature and Speed: A Guide to the Dials and Buttons
Beyond the physical attachments, the most important variables you control are the temperature plus the speed of the airflow. Most hot air brushes offer at least two or three settings for each. These are not arbitrary options; they are calibrated to accommodate the varying resilience of different hair types.
- Low Heat/Low Speed: a setting is ideal for fine, fragile, or chemically treated (colored or permed) hair. The gentle heat is sufficient to style without overwhelming the delicate hair structure. It is also excellent for touching up dry hair or for styling delicate areas like bangs.
- High Heat/High Speed: a setting is reserved for thick, coarse, or very healthy hair that is resistant to styling. The higher temperature plus powerful airflow can effectively shape these more robust hair types. However, it should be used with caution plus always in conjunction with a heat protectant.
- Cool Shot/Cool Setting: a feature, often a separate button, releases unheated air. Its function is not to dry, but to “set” the style. After you have shaped a section of hair with heat, a blast of cool air rapidly cools the hair, locking the newly formed hydrogen bonds into place. a step dramatically increases the longevity of your style plus adds a noticeable boost of shine by sealing the hair cuticle.
A sensible approach is to always start with the lowest heat setting that is effective for your hair. You can always increase the temperature if needed, but damage caused by excessive heat cannot be undone.
A Special Consideration for Fine, Thick, and Coarse Hair
The diversity of human hair texture requires a nuanced approach to heat styling. What works for one type may be ineffective or damaging for another.
- For Fine Hair: The primary challenges are avoiding heat damage plus preventing the hair from being weighed down. Use the low heat, low speed setting. Focus on using the oval or round brush attachment to lift the roots for volume. Work quickly, not allowing the brush to linger on any one section for too long. A volumizing mousse applied before drying can provide extra support.
- For Thick Hair: The main challenge is managing the sheer amount of hair plus ensuring it dries completely. Sectioning is absolutely vital. You may need to use the high heat, high speed setting. The paddle brush attachment can be very efficient for initial smoothing plus drying, followed by the oval barrel for shaping. Ensure each section is fully dry before moving on; any residual dampness will cause the style to collapse plus frizz to appear.
- For Coarse or Curly Hair: The goal is often to achieve smoothness plus combat frizz. Coarse hair can be very resilient but also prone to dryness. Use a moisturizing heat protectant. The high heat setting may be necessary. Tension is your greatest ally. As you pull the brush through the hair, maintain a firm, steady tension to effectively smooth the cuticle. The paddle brush attachment is excellent for a sleek look, while the oval brush can provide a smooth blowout with body.
By thoughtfully pairing your hair’s specific needs with the correct attachment plus settings, you move from simply applying heat to intelligently sculpting your hair.
Step 4: Mastering the Root Lift – The Secret to Lasting Volume
Volume is the very soul of a classic blowout. It is the lift, the body, the sense of airiness that elevates a hairstyle from flat to fabulous. While a hot air brush is adept at smoothing plus curling, its true power for many users lies in its ability to create substantial, lasting volume directly at the scalp. a feat is not achieved by chance but through a specific technique that counteracts gravity plus sets a foundation of support for the rest of the hair. Understanding the mechanics behind root lift is the key to unlocking this coveted dimension in your hair.
The Mechanics of Volume: Lifting Hair at the Scalp
To comprehend how to create volume, one must first understand why hair often lies flat. Each hair grows from a follicle in the scalp. Gravity, the natural direction of growth, plus the weight of the hair itself all conspire to pull the hair downwards, causing it to lie flat against the head. To create volume, you must physically lift the root of the hair away from the scalp plus dry it in that elevated position.
When you apply the hot air brush at the root, you are doing two things simultaneously. The heat is breaking the hydrogen bonds while the hair is wet, making it pliable. The mechanical lift from the brush is holding the hair at a 90-degree angle (or greater) from the scalp. As the hot air dries the hair in elevated position, the hydrogen bonds reform, essentially creating a “scaffold” of stiffened hair at the root that supports the rest of the hair shaft, holding it up plus away from the head. The cool shot then solidifies structure, making it resistant to collapsing later in the day.
A Step-by-Step Technique for Maximum Lift
Achieving this root lift requires a deliberate, focused technique. It is the very first thing you should do when you begin styling a new section of hair.
- Position the Brush: Take your chosen section of hair, which should be no wider than the brush barrel. Place the hot air brush underneath the section, as close to the scalp as you can comfortably get.
- Lift and Hold: Pull the hair upwards plus away from the scalp, so the hair is taut plus perpendicular to your head. Hold the brush at the root for several seconds (perhaps 5-10 seconds, depending on your hair’s thickness). You are not moving the brush yet; you are concentrating the airflow plus the lift directly at the scalp. You can even gently rotate the brush in place to ensure all the roots in that section are being lifted plus dried.
- The Slow Pull: Once the roots feel mostly dry plus lifted, you can begin to slowly glide the brush through the rest of the hair section, from the mid-lengths to the ends. Maintain that upward tension as you begin the pull to preserve the lift you just created.
- Repeat for Emphasis: For areas where you want dramatic volume, like the crown of your head (the mohawk section), you can repeat the process. After your first pass, you can place the brush at the root again plus give it another blast of heat while lifting upwards.
Think of it like building a house. You must construct a strong foundation before you can put up the walls. The lift at your roots is the foundation of your entire hairstyle.
Common Mistakes to Avoid When Building Volume
Many people struggle to create lasting volume because they fall into a few common traps. Being aware of these can dramatically improve your results.
- Starting at the Ends: A frequent error is to simply start brushing from the ends of the hair upwards. a method does nothing to address the direction of the root. You must always start the styling process for each section at the scalp.
- Pulling Downwards: If you place the brush on top of the hair section plus pull downwards, you are actively working against volume. You are drying the hair flat against the head, reinforcing the very problem you are trying to solve. Always place the brush underneath the section plus pull upwards and outwards.
- Not Drying the Roots Completely: The roots must be 100% dry for the volume to hold. If any moisture remains, the hydrogen bonds will not be set, plus gravity will quickly pull the hair flat again as the last bit of water evaporates. Before you move on from the roots, touch them with your fingers (carefully) to ensure they are completely dry.
- Forgetting the Cool Shot: Heating the hair creates the shape, but cooling the hair sets the shape. Skipping the cool shot on the roots is like building a sculpture out of clay plus forgetting to fire it in the kiln. The shape will be temporary. A 5-second blast of cool air on the lifted root is essential for locking in that volume.
By focusing your initial efforts on this crucial root-lifting technique, you are not just styling your hair for the moment; you are engineering a structure that will provide body plus movement all day long.
Step 5: The Styling Pass – Shaping the Mids and Ends
Once the foundation of volume has been established at the roots, the focus shifts to the lengths of the hair—the mid-shaft plus the ends. a phase is where the specific character of the style is defined. Whether the desired outcome is a sleek, glass-like finish, a soft, bouncy curl, or a subtle, face-framing flick, the technique used during the styling pass is what brings that vision to life. It is a process that relies on control, tension, plus a clear understanding of how the brush’s movement translates into the final shape of the hair.
For a Sleek, Straight Finish: The Downward Glide
Achieving a straight yet voluminous look—the hallmark of a classic blowout—is one of the primary functions of a hot air brush, especially one with an oval or paddle attachment. The technique is straightforward but requires precision.
After lifting the roots, you will slowly pull the brush through the rest of the hair section. For a straight finish, the key is to maintain consistent tension plus a downward trajectory. As you glide the brush from the mid-lengths to the ends, you should feel a gentle pull on the hair. a tension is what allows the bristles to grip each strand plus smooth the cuticle flat. The hot airflow, directed downwards along the hair shaft, encourages the cuticles to lie flat, which is what creates a smooth surface that reflects light plus appears shiny.
For maximum sleekness, you can slightly rotate the brush inwards as you reach the ends. a motion gives the ends a subtle, polished bevel rather than letting them look stark or frayed. Imagine you are trying to smooth a ribbon with the edge of a scissor blade; the combination of tension plus directional movement is what creates the smooth finish.
Creating Soft Curls and Flicks: The Art of the Twist
If your goal is to create more movement, such as soft curls or beveled ends, the technique involves incorporating rotation. a method is most effective with an oval or round brush attachment.
Begin the pass as usual, starting from the lifted root. As you glide the brush down the hair shaft, begin to rotate the brush when you reach the point where you want the curl to start. You can wrap the entire section of hair around the barrel. To do so, glide the brush to the very ends of the section. Then, with the ends held taut, rotate the brush upwards, wrapping the hair around the barrel until you reach the mid-lengths or even the root, depending on how high you want the curl.
Hold the wrapped hair in the hot airflow for several seconds (5-10) to allow the heat to penetrate plus set the shape. It is here that a rotating hot air brush can automate the process, but it is easily done manually. After holding, you can either unwind the hair by rotating the brush in the opposite direction, or you can release the curl by simply pulling the brush downwards. For a bouncier curl, unravel it. For a looser wave, gently pull the brush out. To create a simple flick at the end, just rotate the brush a half-turn or a full turn only when you reach the last few inches of hair.
Tension is Key: How to Hold the Brush for Optimal Smoothing
The concept of “tension” has been mentioned several times, for good reason. It is perhaps the most critical, yet least understood, element of a successful blowout. Without proper tension, the hot air merely blows the hair around, creating frizz plus a lack of control.
Tension is created by the interplay between the brush plus your free hand. As you place the brush at the root of a section, use your other hand to hold the very ends of that same section of hair. As you pull the brush down the hair shaft, your free hand should be guiding the hair over the brush plus pulling it taut. a pull ensures that the bristles can fully engage with the hair, holding it firmly against the heated barrel.
You should feel a distinct, but gentle, resistance. It should not be painful or feel like you are ripping your hair out. It is a controlled, steady pull that keeps the hair section organized plus allows for maximum smoothing plus shaping. If your hair is simply flopping over the brush loosely, you do not have enough tension. By mastering the right amount of tension, you provide the brush with the perfect canvas to work its magic, transforming potentially frizzy, unruly strands into a polished, cohesive style.
Step 6: The Cool Shot – Locking in Your Look for Longevity
In the theater of hairstyling, the application of heat is the dramatic action that creates the shape. The cool shot, however, is the quiet, final direction that ensures the performance lasts. Often overlooked or misunderstood, the cool shot button on a hot air brush is not a superfluous feature; it is a scientifically grounded mechanism crucial for the final fixation plus refinement of your style. Its proper use is the dividing line between a hairstyle that wilts within hours versus one that maintains its form, shine, plus integrity throughout the day.
The Science Behind the Cool Shot: Sealing the Hair Cuticle
To appreciate the function of the cool shot, we must return to the molecular level of the hair. As previously discussed, the heat from the hot air brush, in conjunction with water, breaks the weak hydrogen bonds within the hair’s keratin structure. a process makes the hair malleable, allowing you to reshape it into a curl or a straight configuration. While the hair is hot, these bonds are in a state of flux, not yet fully set. If the hair is left to cool down slowly on its own, it can be affected by humidity, gravity, or movement, causing the style to gradually lose its shape.
The cool shot provides a solution through rapid thermal change. When you activate the cool shot, the device ceases to heat the air, instead pushing room-temperature air through the barrel. a blast of cool air quickly lowers the temperature of the hair shaft. a rapid cooling forces the hydrogen bonds to solidify almost instantly in their new, styled position (Robbins, 2012).
Moreover, the cool air has a significant effect on the outermost layer of the hair, the cuticle. Heat can cause the tiny, overlapping scales of the cuticle to lift slightly. The sudden application of cold air encourages these scales to contract plus lie flat again. A smooth, sealed cuticle has two major benefits: it protects the inner cortex of the hair, plus it creates a flat surface that reflects light more effectively. The result is a noticeable increase in shine plus a reduction in the appearance of frizz.
When and How to Use the Cool Shot Feature Effectively
The cool shot is not meant to be used continuously. It is a finishing step, applied to each section after it has been fully shaped with heat. The process should be systematic.
- Shape with Heat: First, use the hot air setting to style your section of hair completely. Whether you are lifting the root, smoothing the length, or creating a curl, complete the entire heated portion of the styling process until the hair is 100% dry plus shaped as you desire.
- Hold the Shape: Keep the hair section in its final styled position. If you have created a curl by wrapping the hair around the barrel, keep it wrapped. If you have lifted the root, keep the brush held in that lifted position at the scalp.
- Activate the Cool Shot: While holding the hair in shape, press plus hold the cool shot button. Let the cool air flow over the section for about 5 to 10 seconds. You should feel the hair itself cool down.
- Release the Section: After the cool shot, you can release the section of hair from the brush. The style will now be “set” in place.
You should repeat process for every single section of your hair. It may seem to add a few extra seconds to each section, but the payoff in terms of style longevity is immense. It is the professional secret to a blowout that truly lasts.
The Impact on Shine and Frizz Reduction
The aesthetic benefits of the cool shot are immediately apparent. The most noticeable effect is an increase in shine. The hair appears glossier plus healthier because the sealed cuticles create a uniform, reflective surface. Think of the difference between a calm lake versus a choppy one; the calm lake reflects a clear image because its surface is smooth. The cool shot smooths the surface of your hair in a similar way.
Concurrently, frizz is visibly reduced. Frizz is often caused by raised cuticles that fail to align, creating a rough, uneven texture. By encouraging the cuticles to lie flat, the cool shot creates a more cohesive, sleek surface, taming the stray hairs that contribute to a frizzy appearance. a final blast of cold air is your best defense against the encroaching effects of humidity, helping your meticulously crafted style remain polished plus defined for much longer than it would otherwise. It is the final, indispensable step in the artful use of a hot air brush.
Step 7: Finishing Touches and Maintenance – Preserving Your Style
The work of the hot air brush is complete, but the art of the perfect blowout extends beyond the final pass of the tool. The moments after styling are critical for adding final polish, enhancing longevity, plus ensuring the health of both your hair your styling instrument. These finishing touches plus maintenance routines are not afterthoughts; they are integral parts of a holistic styling practice that preserves the beauty of your work plus the condition of your tools for future use.
Applying Finishing Products: Serums, Oils, and Hairsprays
Once your hair is styled plus has completely cooled, you can apply finishing products to enhance the look plus hold. The choice of product depends on your hair type plus desired effect.
- For Shine and Frizz Control: A lightweight shine serum or a hair oil is an excellent choice. Dispense a very small amount—often just a single drop—into your palms. Rub your hands together to warm the product plus distribute it evenly. Then, gently graze your hands over the surface of your hair, focusing on the mid-lengths plus ends. Avoid the roots, as this can weigh them down plus make them look greasy. a product will add a final layer of polish, tame any remaining flyaways, plus add a healthy-looking luster.
- For Hold and Texture: If you need your style to withstand a long day or a humid environment, a flexible-hold hairspray is your best option. Hold the can about 10-12 inches away from your head plus mist it lightly over your hair. Avoid a heavy, concentrated spray, which can make the hair stiff plus crunchy. For targeted volume, you can lift sections of your hair at the crown plus lightly spray underneath at the root. A texturizing spray can also be used to give the hair a more piecey, lived-in look.
The rule with all finishing products is “less is more.” It is always easier to add a little more than it is to remove an excess of product.
How to Maintain Your Hot Air Brush for Peak Performance
Like any high-performance tool, your hot air brush requires regular maintenance to function optimally plus safely. The primary culprit that degrades performance is the accumulation of hair, dust, plus product residue in the bristles plus the air intake vents.
A clogged brush cannot grip the hair properly, plus blocked vents can cause the motor to overheat, posing a safety hazard plus shortening the lifespan of the device. Cleaning your brush should be a regular habit. After each use, once the brush has cooled completely, use your fingers or a comb to remove any hair that has become wrapped in the bristles.
For a deeper clean, which should be done periodically, use a damp cloth to wipe down the barrel plus bristles to remove product buildup. Pay special attention to the air intake filter, which is usually located at the base of the handle. Many models have a removable filter cover Mashable.com. Open it plus use a small, soft brush (like an old toothbrush) to gently clear away any lint or dust that has accumulated. A clean filter ensures maximum airflow, which allows the tool to work efficiently plus prevents the motor from straining.
Extending the Life of Your Blowout
You have invested time plus effort into creating a beautiful blowout; it is natural to want it to last as long as possible. Several strategies can help you preserve your style for a second or even a third day.
- Protect Your Hair While You Sleep: The friction from a cotton pillowcase can rough up the hair cuticle, creating frizz plus causing your style to lose its shape. To prevent a, sleep on a silk or satin pillowcase, which has a much smoother surface. Alternatively, you can loosely wrap your hair in a silk scarf or bonnet before bed.
- Use Dry Shampoo: On the second or third day, your roots may start to look a bit oily. Dry shampoo is the perfect solution. Lift sections of your hair plus spray the dry shampoo directly at the roots. Let it sit for a minute or two to absorb the oils, then use your fingers to massage it in plus distribute it. a not only refreshes your hair but also provides a fantastic boost of volume.
- A Quick Touch-Up: You do not need to completely restyle your hair. You can use your hot air brush on the cool or low-heat setting to quickly touch up any areas that have become unruly. A quick pass over the front pieces or the crown can be enough to bring your style back to life.
By incorporating these finishing, maintenance, plus preservation techniques into your routine, you elevate the use of a hot air brush from a simple act of drying hair to a comprehensive system for achieving plus maintaining beautiful, salon-quality styles at home.
Perguntas frequentes (FAQ)
Can a hot air brush replace my hair dryer and straightener?
For many individuals, especially those with fine to medium hair that is not intensely curly, a hot air brush can indeed serve as an all-in-one tool, replacing both a hair dryer plus a straightener or curling iron. It excels at drying hair from a damp state while simultaneously smoothing, volumizing, or creating soft curls. However, for those with very thick, coarse, or tightly coiled hair, a traditional high-wattage hair dryer might still be more efficient for removing bulk moisture initially. Similarly, for a pin-straight finish or very defined, tight curls, a dedicated flat iron or curling wand may provide more intense, targeted results.
How often can I use a hot air brush without damaging my hair?
The frequency of use depends heavily on your hair’s health plus your protective measures. If you use a quality heat protectant every time, stick to the lowest effective heat setting for your hair type, plus ensure your hair is properly conditioned, you can use a hot air brush quite frequently, even daily for some robust hair types. However, it is always wise to give your hair breaks from heat styling. Pay attention to your hair’s condition. If you notice increased dryness, split ends, or breakage, it is a sign to reduce the frequency of use.
What’s the difference between a hot air brush and a regular round brush with a dryer?
The primary difference is one of integration plus ergonomics. Using a round brush plus a separate dryer requires two hands plus a significant amount of coordination to manage both tools at once. A hot air brush combines these two functions into a single, one-handed tool. a integration makes the process significantly easier, more efficient, plus more accessible for non-professionals. It allows you to achieve a salon-style blowout with less arm fatigue plus a shallower learning curve.
My hair gets tangled in the hot air brush. What am I doing wrong?
Tangling is a common issue that usually stems from a few correctable errors. First, ensure your hair is thoroughly detangled with a comb before you begin styling. Second, work with smaller, more manageable sections of hair; trying to style too much hair at once is a primary cause of tangles. Third, make sure you are pulling the brush through the hair in a smooth, continuous motion. Do not stop halfway plus try to twist. Finally, if you are wrapping hair for a curl, wrap it neatly plus do not let loose strands get caught.
Is a hot air brush suitable for short hair?
Absolutely. A hot air brush can be an excellent tool for styling short hair. The key is to choose a brush with a smaller barrel diameter. A smaller barrel allows you to get close to the root for lift plus to create shape, bend, or flicks in shorter lengths. It can give bobs beautiful volume plus a polished, beveled edge, or add texture plus direction to a pixie cut.
How do I clean my hot air brush?
Regular cleaning is vital for performance plus longevity. First, ensure the appliance is unplugged plus completely cool. Remove any hair tangled in the bristles using your fingers or a comb. For product buildup, you can gently wipe the barrel plus bristles with a soft, damp cloth. Most importantly, locate the air intake vent (usually at the base) plus clear it of any lint or dust using a small, dry brush, like an old toothbrush. a step prevents the motor from overheating.
Can I use a hot air brush on dry hair?
Yes, you can use a hot air brush on dry hair, but it is best to use the low-heat or cool setting. a method is excellent for second-day touch-ups, taming bedhead, smoothing out creases from a hair tie, or refreshing volume at the roots. Using high heat on already dry hair can be unnecessarily damaging, as there is no surface water to evaporate, so the heat directly targets the hair fiber itself.
Conclusão
The journey through the principles plus practices of using a hot air brush reveals it to be far more than a simple convenience. It is a sophisticated instrument of personal expression, capable of transforming the often-arduous task of hair styling into a rewarding, creative process. By understanding the foundational elements—from the scientific basis of its operation to the practical nuances of preparation, sectioning, plus temperature control—one gains not just a skill, but a sense of empowerment. The ability to consistently achieve a polished, voluminous, salon-quality finish at home demystifies professional techniques plus places artistic control firmly in your own hands. Mastering a tool is about internalizing its logic, respecting its power, plus guiding it with intention. With the knowledge of proper technique, the hot air brush ceases to be just an appliance; it becomes a trusted partner in the daily ritual of crafting your personal style.
Referências
Gavazzoni Dias, M. F. (2015). Hair cosmetics: An overview. International Journal of Trichology, 7(1), 2–15. https://doi.org/10.4103/0974-7753.153450
Lee, Y., Kim, Y. D., Hyun, H. J., Pi, L. Q., Jin, X., & Lee, W. S. (2011). Hair shaft damage from heat and drying time of hair dryer. Annals of Dermatology, 23(4), 455–462. https://doi.org/10.5021/ad.2011.23.4.455
Mashable. (2025, September 11). Best beauty deal: Save 38% on the Dreame AirStyle Pro styler. mashable.com
Maxius Beauty. (2025). Maxius Beauty Official Website.
Menarda. (n.d.). Hot Air Brush. Retrieved June 7, 2024, from
Robbins, C. R. (2012). Chemical and physical behavior of human hair (5th ed.). Springer-Verlag. https://doi.org/10.1007/978-3-642-25611-0